
0
Configure Single Sign-On (SAML) with Microsoft Entra ID and Microsoft 365
These steps will guide you through setting up the SAML single sign-on functionality between Forumbee and Microsoft Entra ID (formerly Azure Active Directory) and Microsoft 365.
- In Microsoft 365, login as an administrator. Click the waffle menu and navigate to Admin.
- In the left navigation locate and select Microsoft Entra admin center (formerly Azure AD).
- Under Identity, expand Applications and select Enterprise applications.
- Click New application.
- Click Create your own application.

- Enter a name for your app such as "Forumbee". Select the option Integrate any other application you don't find in the gallery (Non-gallery):

- Click Create.
- In the left navigation, under Manage, click Single sign-on and select SAML.

- In the Basic SAML Configuration section click Edit.

- In the following steps you will be entering values from your Forumbee account. Open another browser tab and navigate to your Forumbee account.
- Login your Forumbee account as an administrator.
- In Forumbee, navigate to Administration > Integrations > SAML.

- Click SSO Settings to expand the section.
- Copy the Audience field value and paste into the Microsoft field Identifier (Entity ID).

- Copy the SSO Consumer URL field value and paste it into the Microsoft field Reply URL (Assertion Consumer Service URL).

- (Optional) Copy the Single Logout URL field value and paste it into the Microsoft field Logout Url.
- In Microsoft click Save then close the dialog.

- In Microsoft in the Attributes & Claims section click the edit icon.

- Under Additional claims click the claim row which has the value user.mail. In the Name field change the value to email. In the Namespace field, delete the value. Click Save.


- Click the 2nd claim row which has the value user.givenname. In the Name field change the value to firstname. In the Namespace field, delete the value. Click Save.


- Delete the next row which has the value user.userprincipalname.

- Click final claim row which has the value user.surname. In the Name field change the value to lastname. In the Namespace field, delete the value. Click Save.


- You have now finished editing the claims. Your Additional Claims list should now look like this:

- Click X to exit the User Attributes & Claims page.
- In the SAML Certificates panel, download the Certificate (Base64).

- Open the downloaded certificate in a plain text editor. Copy the text.
- In Forumbee, click Identity Provider Setup to expand the panel. Paste the certificate text into the Certificate field.
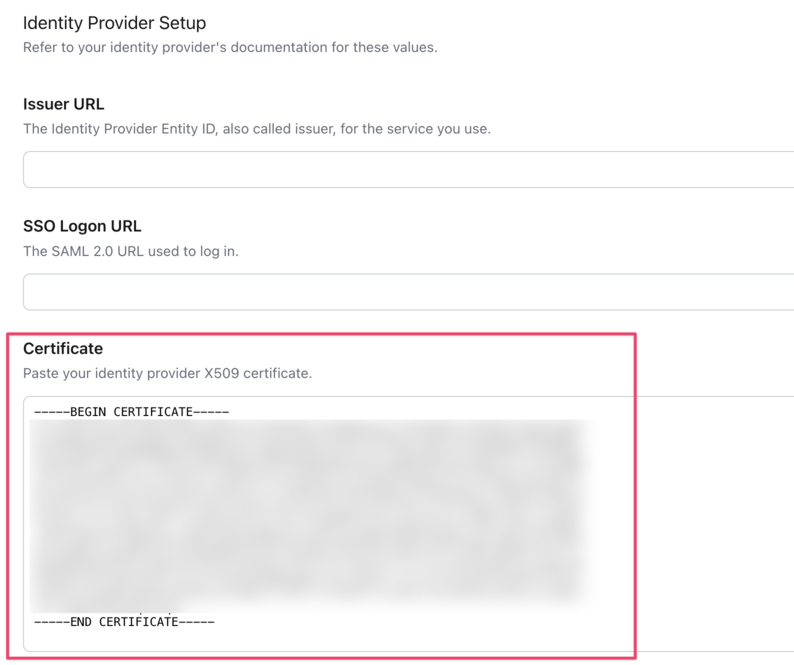
- In Microsoft, copy the value for the field Login URL.

In Forumbee, paste this into the field SSO Logon URL.

- In Microsoft, copy the value for the field Microsoft Entra ID Identifier. In Forumbee, paste this into the field Issuer URL.

In Forumbee, paste this into the field Issuer URL.
- (Optional) In Microsoft, copy the value for the field Logout URL. In Forumbee, paste this into the field SLO Logout URL.
- In Forumbee, click Save at the bottom of the Identity Provider Setup panel.
- Download the Forumbee image Forumbee Icon.png (right-click and select 'download').
- In Microsoft, add the image to the app. Under Manage navigate to Properties. Next to Logo click Select a file and upload the Forumbee image. Click Save.

- In Microsoft, assign users and groups to the app. Under Manage navigate to Users and groups and click Add user/group. Follow the steps on the screen to assign users or groups.

- In Forumbee at the top of the SAML 2.0 page, click the Enable toggle to turn SSO on.
